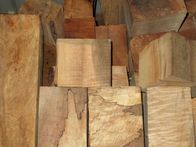
Step #1
All items start out as square blocks of wood. 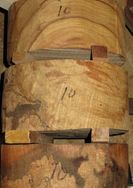
Step #2
Blocks that will become bowls are cut into circles using a band saw. After it has been cut it is then sealed with anchor seal to help stop the wood from cracking. 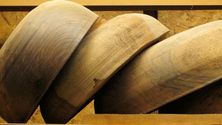
Step #3
These are then “rough turned” into a basic shape to help speed up the drying process. Each rough turned bowl must be once again sealed to prevent cracking. When a block of wood is cut from the tree it typically has a moisture content of 30%+. To minimize cracking the wood must dry to a moisture content of less than 13% before it can be turned into a finished product. It can take up to 18 months for the moisture content to reach this level of dryness. |
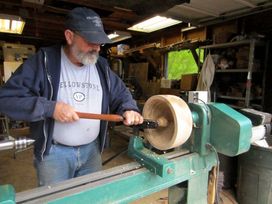
Step #4
When the bowl is ready to be finished it is put back on the lathe and turned to the desired shape and thickness. Step #5 After the bowl is shaped it must be sanded and a finish applied. There are two types of finish that we use. 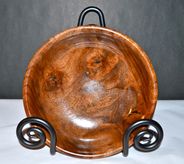
Finished Product
The polyurethane finish is used for a shiny, durable finish. The polyurethane finish does not need to be reapplied during the life of the bowl. The polyurethane bowls are food safe but are not for hot foods. Use for snacks, popcorn, salads, breads, etc. 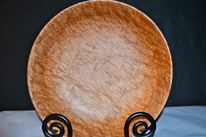
The salad bowl finish is used for a natural finish look. Natural finish bowls will need to have salad bowl finish applied to them periodically depending upon the frequency of use.
The salad bowl finish is food safe but should not be used for hot foods. |
